Custom RadioButton WinForm C# RashiUI
Custom RadioButton WinForm C# RashiUI tools
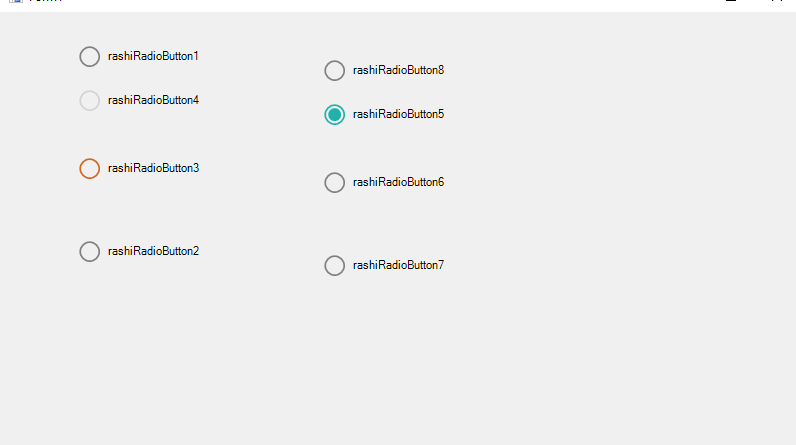
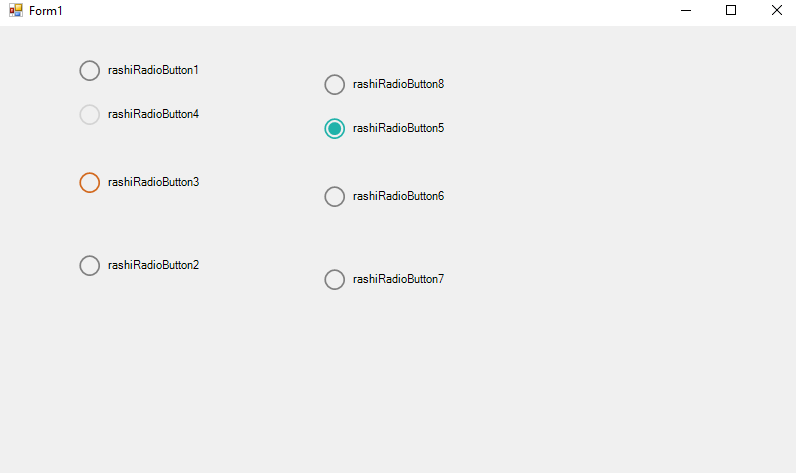
Hello friend’s this is Rashid Hussain come with another video In this tutorial, you will learn how to construct a Custom Radio Button by adding some appearance properties to the existing Windows Form Radio Button so that we can change the color style.
Step 1
Open Visual Studio and Create new Windows Form application
Step 2
After Creating win forms Project Click On Solution Explorer
Then Right Click On Project Name => Add => Class
Step 3
add the following Namespace in the Class
using System;
using System.Collections.Generic;
using System.Linq;
using System.Text;
using System.Threading.Tasks;
using System.Windows.Forms;
using System.Drawing;
using System.Drawing.Drawing2D;
Then inherit the Class with RadioButton
OnPaint
 protected override void OnPaint(PaintEventArgs pevent)
        {
            Graphics graphics = pevent.Graphics;
            graphics.SmoothingMode = SmoothingMode.AntiAlias;
            float bordersize = 19f;
            float checkedsize = 13f;

            RectangleF rectangleBorder = new RectangleF()
            {
                X = 0.6f,
                Y = (this.Height - bordersize) / 2,
                Width = bordersize,
                Height = bordersize,
            };

            RectangleF rectangleChecked = new RectangleF()
            {
                X = rectangleBorder.X + ((rectangleBorder.Width - checkedsize) / 2),
                Y = (this.Height - checkedsize) / 2,
                Width = checkedsize,
                Height = checkedsize
            };


            using (Pen PBorder = new Pen(CheckColor, 1.7f))
            using (SolidBrush solidBrush = new SolidBrush(CheckColor))
            using (SolidBrush Btext = new SolidBrush(this.ForeColor))
            {
                graphics.Clear(this.BackColor);
                if (this.Checked)
                {
                    graphics.DrawEllipse(PBorder, rectangleBorder);
                    graphics.FillEllipse(solidBrush, rectangleChecked);
                }
                else
                {
                    PBorder.Color = unCheckColor;
                    graphics.DrawEllipse(PBorder,rectangleBorder);
                }

                graphics.DrawString(this.Text, this.Font, Btext,
                bordersize + 8, (this.Height - TextRenderer.MeasureText(this.Text, this.Font).Height) / 2);


            }


        }
OnResize
   protected override void OnResize(EventArgs e)
        {
            base.OnResize(e);
            this.Width = TextRenderer.MeasureText(this.Text, this.Font).Width + 30;
        }
Complete Custom RadioButton Class Code
  using System;
using System.Collections.Generic;
using System.Linq;
using System.Text;
using System.Threading.Tasks;
using System.Windows.Forms;
using System.Drawing;
using System.Drawing.Drawing2D;

namespace RashiUI
{
    class RashiRadioButton : RadioButton
    {

        //Fields

        private Color checkColor = Color.LightSeaGreen;
        private Color unCheckColor = Color.Gray;

        public Color CheckColor
        {
            get
            {
               return checkColor;
            }
            set
            {
                checkColor = value;
                this.Invalidate();
            }
        }
        public Color UnCheckColor
        {
            get
            {
                return unCheckColor;
            }
            set
            {
                unCheckColor = value;
                this.Invalidate();
            }
        }

        public RashiRadioButton()
        {
            this.MinimumSize = new Size(0, 24);
        }


        protected override void OnPaint(PaintEventArgs pevent)
        {
            Graphics graphics = pevent.Graphics;
            graphics.SmoothingMode = SmoothingMode.AntiAlias;
            float bordersize = 19f;
            float checkedsize = 13f;

            RectangleF rectangleBorder = new RectangleF()
            {
                X = 0.6f,
                Y = (this.Height - bordersize) / 2,
                Width = bordersize,
                Height = bordersize,
            };

            RectangleF rectangleChecked = new RectangleF()
            {
                X = rectangleBorder.X + ((rectangleBorder.Width - checkedsize) / 2),
                Y = (this.Height - checkedsize) / 2,
                Width = checkedsize,
                Height = checkedsize
            };


            using (Pen PBorder = new Pen(CheckColor, 1.7f))
            using (SolidBrush solidBrush = new SolidBrush(CheckColor))
            using (SolidBrush Btext = new SolidBrush(this.ForeColor))
            {
                graphics.Clear(this.BackColor);
                if (this.Checked)
                {
                    graphics.DrawEllipse(PBorder, rectangleBorder);
                    graphics.FillEllipse(solidBrush, rectangleChecked);
                }
                else
                {
                    PBorder.Color = unCheckColor;
                    graphics.DrawEllipse(PBorder,rectangleBorder);
                }

                graphics.DrawString(this.Text, this.Font, Btext,
                bordersize + 8, (this.Height - TextRenderer.MeasureText(this.Text, this.Font).Height) / 2);


            }


        }

        protected override void OnResize(EventArgs e)
        {
            base.OnResize(e);
            this.Width = TextRenderer.MeasureText(this.Text, this.Font).Width + 30;
        }


    }
}
Video tutorial
Click the button below for source code
Thank you for reading this article. Please don’t forget to subscribe our official YouTube Channel RashiCode