Custom DateTimePicker in C# WinForm App RashiUI
Custom DateTimePicker in C# WinForm App RashiUI
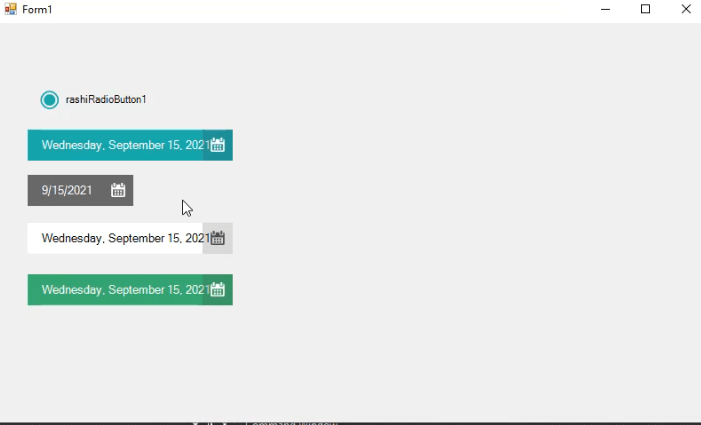
In this article you will learn how to construct a Custom DateTimePicker by adding some appearance properties to the existing Windows Form DateTimePicker so that we can change the color style. Custom UI controls are most Popular for Custom Design . You will design your controls on the way you want to design. you can use these custom ui controls in every project. and you don’t need to customize the controls in every project. once you customize in your way you can use it in every project you want easily. Lot of UI toolkit are available . but these ui framework have some limitation they will expire in 30 days and they demand to buy the license. other wise the controls in project are not work properly . there are lot of other problems with third party frame work . so i want to show teach how you can build your own ui controls like( textbox,radiobutton,dateTimepicker etc) so connect with me for further details and don’t forget to subscribe our Official YouTube Channel RashiCode. so lets start with our today Custom Control . After reading this article you will able to develop your own custom DateTimePicker Control in C# windows Form application. Follow the steps.
You may also like Custom RadioButton and CircularPictureBox in C# win form app.
Open Visual Studio and Create new Windows Form application
Step 2
After Creating win forms Project Click On Solution Explorer
Then Right Click On Project Name => Add => Class
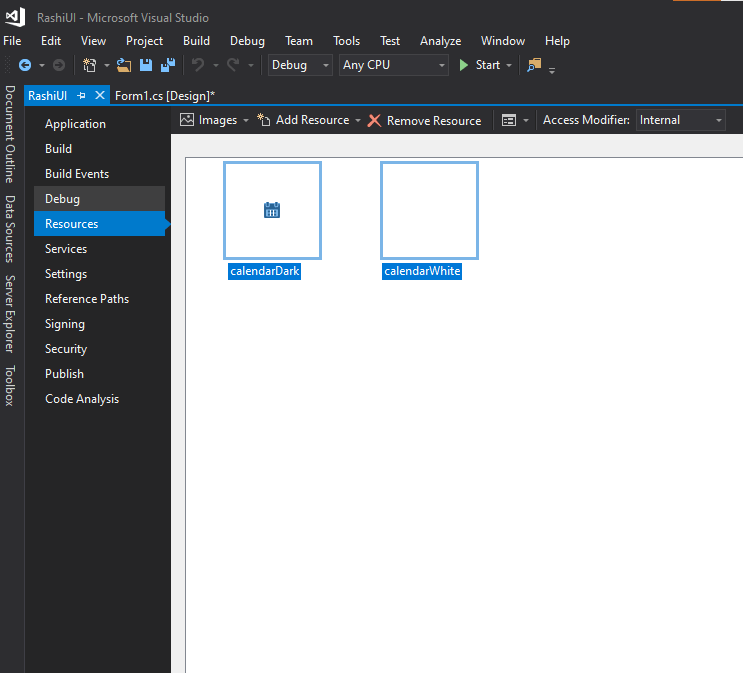
For DateTimePicker Control you nedd to add two image of Calendar so open Solution Explorer then Double Click On Properties a new window Open Select Resources Tab and paste the Images
Open Class Then inherit the Class with DateTimePicker add the code below
using System;
using System.Collections.Generic;
using System.Linq;
using System.Text;
using System.Threading.Tasks;
using System.Windows.Forms;
using System.Drawing;
using System.Drawing.Drawing2D;

namespace RashiUI
{
class RashiDateTimePicker:DateTimePicker
{
private Color fillColor = Color.LightSeaGreen;
private Color textColor = Color.White;
private Color borderColor = Color.Gray;
private int borderSize = 0;


private bool dropDown = true;
private Image CalenderImg = Properties.Resources.calendarWhite;
private RectangleF iconButton;
private const int iconWidth = 34;
private const int arrowWidth = 17;

public Color FillColor
{
get
{
return fillColor;
}
set
{
fillColor = value;
if (fillColor.GetBrightness()>=0.6f)
{
CalenderImg = Properties.Resources.calendarDark;
}
else
{
CalenderImg = Properties.Resources.calendarWhite;
}
this.Invalidate();
}
}
public Color TextColor
{
get
{
return textColor;
}
set
{
textColor = value;
this.Invalidate();
}
}
public Color BorderColor
{
get
{
return borderColor;
}
set
{
borderColor = value;
this.Invalidate();
}
}
public int BorderSize
{
get
{
return borderSize;
}
set
{
borderSize = value;
this.Invalidate();
}
}


public RashiDateTimePicker()
{
this.SetStyle(ControlStyles.UserPaint, true);
this.MinimumSize = new Size(0,35);
this.Font = new Font(this.Font.Name, 9.5f);
}


protected override void OnDropDown(EventArgs eventargs)
{
base.OnDropDown(eventargs);
dropDown = true;
}

protected override void OnCloseUp(EventArgs eventargs)
{
base.OnCloseUp(eventargs);
dropDown = false;
}

protected override void OnKeyPress(KeyPressEventArgs e)
{
base.OnKeyPress(e);
e.Handled = true;
}

protected override void OnPaint(PaintEventArgs e)
{
using (Graphics graphics = this.CreateGraphics())
using (Pen pen = new Pen(borderColor, borderSize))
using (SolidBrush fillBrush = new SolidBrush(fillColor))
using (SolidBrush textBruh = new SolidBrush(textColor))
using (SolidBrush iconBrush = new SolidBrush(Color.FromArgb(50, 64, 64, 64)))
using (StringFormat format = new StringFormat())
{
RectangleF dtpArea = new RectangleF(0, 0, this.Width - 0.5f, this.Height - 0.5f);
RectangleF iconArea = new RectangleF(dtpArea.Width - iconWidth, 0, iconWidth, dtpArea.Height);
pen.Alignment = PenAlignment.Inset;
format.LineAlignment = StringAlignment.Center;

graphics.FillRectangle(fillBrush, dtpArea);
graphics.DrawString(" " + this.Text, this.Font, textBruh, dtpArea, format);

if (dropDown == true) graphics.FillRectangle(iconBrush, iconArea);
if (borderSize >= 1) graphics.DrawRectangle(pen, dtpArea.X, dtpArea.Y, dtpArea.Width, dtpArea.Height);

graphics.DrawImage(CalenderImg, this.Width - CalenderImg.Width - 9, (this.Height - CalenderImg.Height) / 2);

}
}

protected override void OnHandleCreated(EventArgs e)
{
base.OnHandleCreated(e);
int iconWidth = GetIconWidth();
iconButton = new RectangleF(this.Width - iconWidth, 0, iconWidth, this.Height);
}

protected override void OnMouseMove(MouseEventArgs e)
{
base.OnMouseMove(e);
if (iconButton.Contains(e.Location))
this.Cursor = Cursors.Hand;
else this.Cursor = Cursors.Default;
}


private int GetIconWidth()
{
int textwidth = TextRenderer.MeasureText(this.Text, this.Font).Width;
if (textwidth <= this.Width - (iconWidth + 20))
return iconWidth;
else return arrowWidth;
}
}
}
Video tutorial
Click the button below for source code
Thank you for reading this article. Leave a comment if you have any question about this article. Please don’t forget to subscribe our official YouTube Channel RashiCode